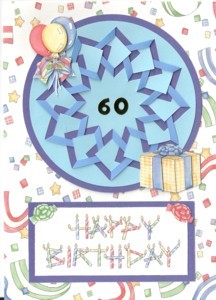
Birthday Card With Diamond Cut and Fold Wreath
I made this cut an fold birthday card using my Diamond Cut and Fold pattern and clip art by Janie Dawson that I purchased from PcCrafter several years ago. The clip art is no longer available, but you could easily adapt a stamp or other graphics to obtain the same effect.
You will need:
- Diamond Cut and Fold Pattern
- Birthday Celebrations clip art
- 5" x 7" print to edge white card blank
- Approximately 4" x 4" duo paper - bright blue on one side and light blue on the other.
- Approximately 4 1/4" x 6" dark blue paper
- 1 sheet white cardstock or heavyweight paper
- Gold number stickers
- Circle template or cutting die
- Scoring Tool
- Clear plastic ruler
- Paper cutter
- Scissors
- Craft knife. (An X-acto knife works well)
- Cutting mat
- Glue
- Adhesive foam squares or pop-dots
- Low-tack tape or plastic-tack
- Tweezers (optional - used for arranging small cut out items)
Step 1
- Cut a 4 1/4" Circle from the dark blue paper
- Cut a 1 3/4" x 3 3/4" rectangle from the dark blue paper
Step 2
Using the graphics from the Birthday Celebrations creatable:
- Print the confetti background onto the 5" x 7" card blank
- Print the following graphics onto the cardstock, sized as indicated:
- Three copies of the balloons, 2" high x 1 1/8" wide
- Three copies of the package, 1 1/4" high 1 1/2" wide
- One copy of Happy Birthday, 1 1/4" high x 3 1/4" wide
- One copy of the bows sized so that they are the same size as the bow on top of the package.
Step 3
Using low-tack tape or plastic-tack attach the 3 3/4" Diamond Cut and Fold Pattern to the light blue side of the duo paper.
You will be cutting a circle around the finished design, so make sure you center the pattern on the paper.
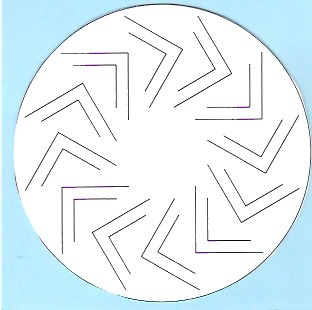
Step 4
Place the paper with the pattern attached to it on a cutting mat. Using your craft knife, carefully cut along each of the lines making sure that you cut through both the pattern and the paper underneath.
Step 5
Remove the pattern.
Using a ruler and a scoring tool, score along the ends of each half-diamond. This will make a nice crisp fold for the next step.
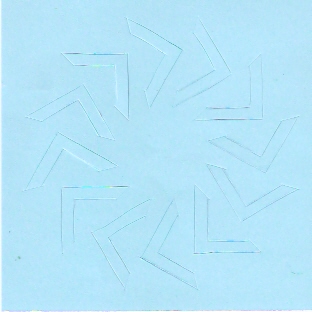
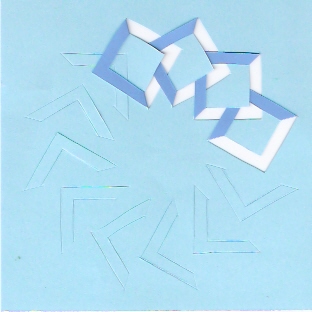
Step 6
Fold each half-diamond forward along the score lines, tucking the edge of each diamond under the solid center of the next diamond as shown.
Step 7
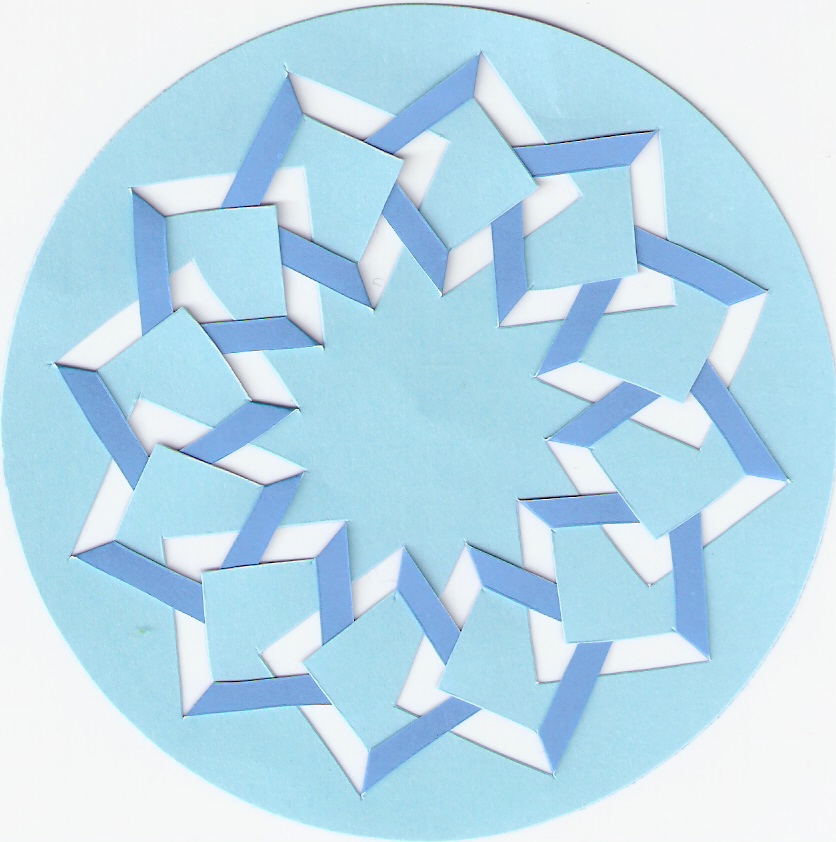
After you have finished folding and tucking, use a circle-cutter or cutting die to cut around the design as shown. Center and glue the design to the dark blue circle you cut out in Step 1
Step 8
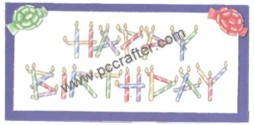
Cut a 1 1/4" x 3 1/4" rectangle around "Happy Birthday" Mount it in the center of the dark blue rectangle you cut out in Step 1. Cut out two of the ribbons and put one at both upper corners of the "Happy Birthday" label
Step 9
Align and attach the circle with the cutwork completed in step 7 and the "Happy Birthday" label completed in step 8 to the front of the card
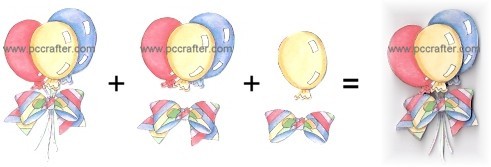
Step 10 - 3D Balloons
Cut out one set of balloons in it's entirity, including the strings. This will be your bottom layer
- For the middle layer, cut out the bow and the three balloons.
- For the top layer, cut around only the yellow ballon and the top part of the bow.
- Using the foam squares or pop-dots, put the layers together as illustrated.
Step 11

In the same way, cut and layer the package as illustrated.
Step 12
To complete the card, attach the balloons the the upper left side, the package to the lower right side and the gold numbers to the center of the cut and fold circle.
Handcrafted Greetings Logo Designed by Tony Headrick