
Basic Iris Folding Instructions
Iris folding refers to a technique where folded strips of colored or patterned paper are layered in a spiral pattern behind an aperture. It is called Iris Folding because it resembles the iris of a camera.
There are several free iris folding templates on the Iris Folding Templates page.
To make your iris folded greeting card, You will need:
- scissors.
- scraps of decorative paper in various colors cut in 1" strips and folded in half lengthwise (some instructions say to cut them into 1"x3" strips, but I like to leave it in a long strip and then just cut off the lengths I need as I go.).
- Cellophane tape
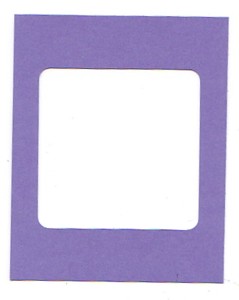
- 4"x5" piece of colored cardstock.
- 4 1/4" x 5 1/2" note card.
- A template or pattern for cutting an aperture in the colored cardstock. (A Coluzzle or Sizzix also work very well for this.)
- Craft knife (for cutting out the aperture).
- Iris folding template (from the Iris Folding Templates page).
Step 1
Using a craft knife and template, cut out an aperture in the colored cardstock.
If you want to cut a fancy border, now is the time to do that too.
Step 2
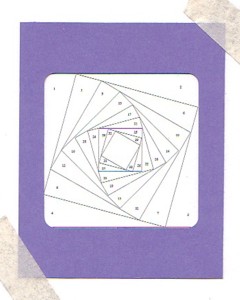
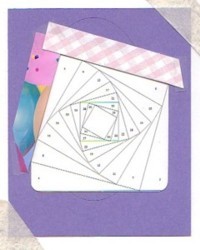
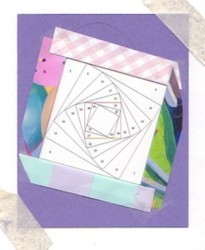
Position the card with the aperture cut-out over one of the iris folding templates, face down. You will be working on the back side of the card.
Tape the card to the template using non-permanent tape (Masking tape works well for this. If the tape is too sticky, stick it to a cotton cloth first to reduce its stickiness)
Step 3
Arrange your folded strips of paper in the order that you want to apply them to the card.
Start with #1 on the template:
- Cut a strip of paper so that it is a little longer than the aperture opening.
- Line up the folded side of the strip of paper with the inside edge of the area labeled with a "1"
- Tape both ends of the strip of paper to the back of the card
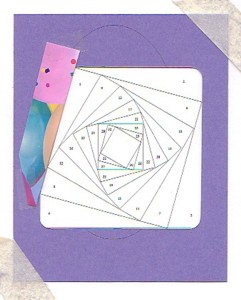
Step 4
Using the next color, follow the same instructions for #2. Repeat all the way around the aperture, following the numbers and working inward as you complete each round. Stop when you have the desired size for the aperture opening.
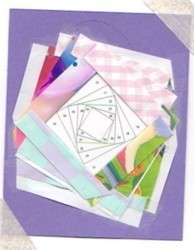
The back of the card will look quite messy as you progress, but when you flip the card over it should look something like this.
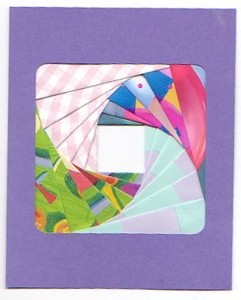
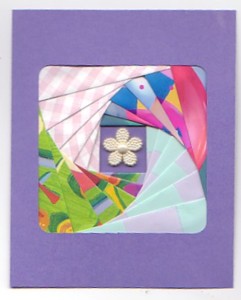
Step 5
To finish the center attach a piece of holographic paper, a small picture, a decorative button, etc. You can now mount your finished work using glue or double-sided tape. 3D Foam pads works well if you used a heavier weight paper for your design and you find that it is too thick to mount directly onto the card.
Handcrafted Greetings Logo Designed by Tony Headrick