
Tea Bag Folding Instructions for a Simple Star
KEY
Mountain Fold
Valley Fold
Prev. Mountain Fold
Prev. Valley Fold
Valley Fold
Prev. Mountain Fold
Prev. Valley Fold
back
of tile
of tile
printed side
of tile
of tile
OR
printed side
of tile
If there is more than one layer. Upper layers will be darker (lightest on bottom, darkest on top).
of tile
Instructions
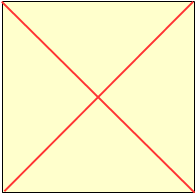
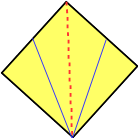
Fold in half diagonally in both directions with the printed side in.
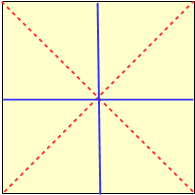
Fold in half horizontally and vertically with the printed side out.
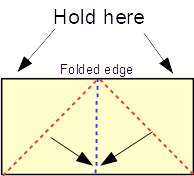
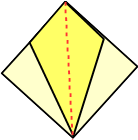
With the tile folded in half hold as shown and push the folded edges toward the center so that the valley folds meet and the mountain folds are pushed up on the top layer and down on the bottom layer.
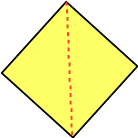
Flatten the tile and position it so that the folded edges are at the top.
Fold the lower left side of the top layer under and to the center. Repeat with the lower right side.
Your finished segment should look like this. You will need eight of these to make a star.
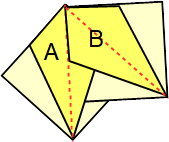
Pick up two segments. Slide the bottom layer of segment (B) between the top and bottom layers of segment (A). The top layer of segment (A) goes between the top and bottom layers of segment (B).
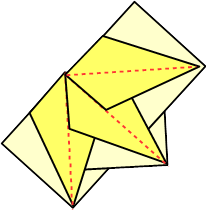
Continue with the third through seventh segments.
Slide the final segment into place between the first and seventh segments.
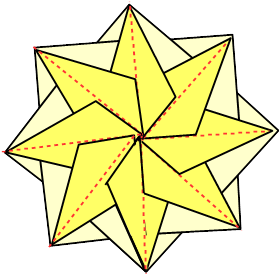
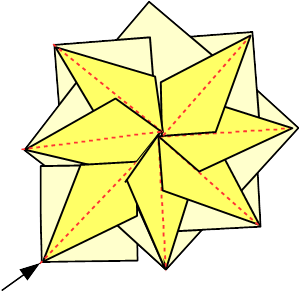
Your completed medallion should look like this.
Handcrafted Greetings Logo Designed by Tony Headrick