
Gold Star Embroidery Instructions
These instructions are for the five pointed star pattern. You can download the pattern here.
If this is the first time you have tried paper embroidery, I recommend that you try the raindrop ornament first.
You will need:
- Star pattern
- Heavy card stock 4" x 5 1/4"
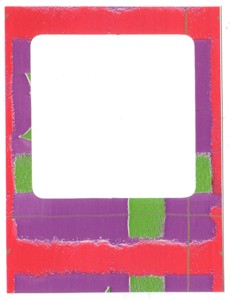
- 4" x 5 1/4" Decorative paper with 3" x 3" square aperture cut in it.
- A craft knife for cutting the aperture in the decorative paper
- Pre-folded 4 1/4" x 5 1/2" greeting card blank(or you can cut your own)
- Foam pad (1/8" or so thick)- this will get poked full of holes so be sure to use something you don't want to keep.
- Embroidery needle
- Paper piercing tool (optional)
- 45" six-strand metallic gold embroidery floss (I used DMC #5282)
- Cellophane tape
- Glue stick
Step 1
Glue the decorative paper with the aperture to the 4" x 5 1/4" piece of heavy card.
Step 2
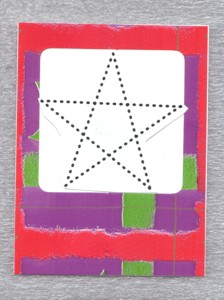
Cut out one of the star patterns and center it inside the aperture on the front of the heavy cardstock. Place the cardstock on top of the foam pad pattern side up. Using your embroidery needle or paper piercing tool, poke a hole through each of the dots in the pattern making sure to go all the way through the card. When you have punched all of the holes, remove the pattern.
Step 3
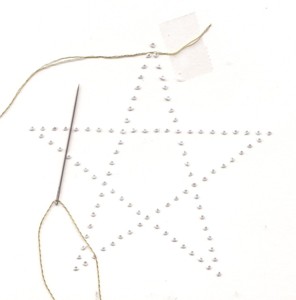
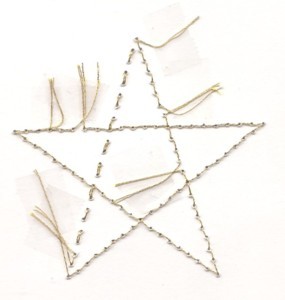
Thread your embroidery needle with a single strand of gold floss. Tape one end of the floss to the back of the card as shown.
Note: While embroidering, when you come to the end of a piece of floss, just tape the ends to the back of the card. Do not tie knots as it will create bumps under your work.
Step 4
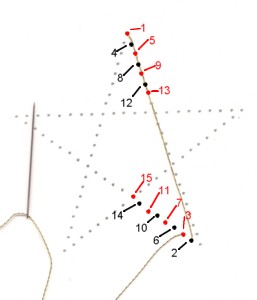
Turn the card over so that the front is facing up. Bring the needle up at #1, then down at #2, up at #3 and down at #4, etc. Note that on the red dots, the needle passes from the back of the card to the front (up) and on the black dots the needle passes from the front to the back of the card (down).
Step 5
Continue the rest of the way along the two sides of the star point.
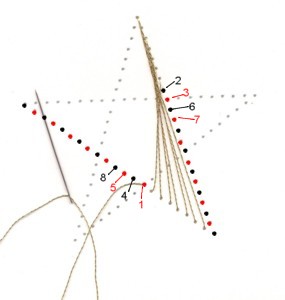
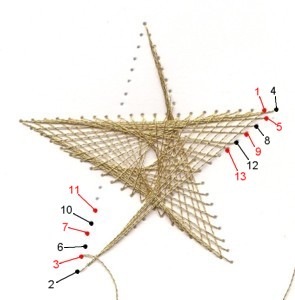
Step 6
Turning corners can be a little tricky the first few times you do it. Follow the numbers to turn the corner and start on the second point.
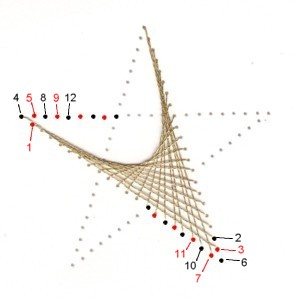
Step 7
Continue along both sides until you reach the third point.
Step 8
Continue around the third point referring to the diagram at the left. Continue to the fourth point.
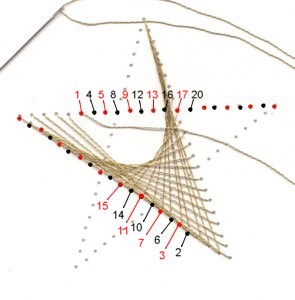
Step 9
Refer to the following diagram for the fourth point.
Step 10
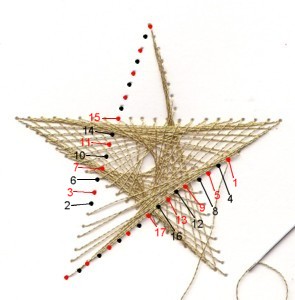
Continue as shown
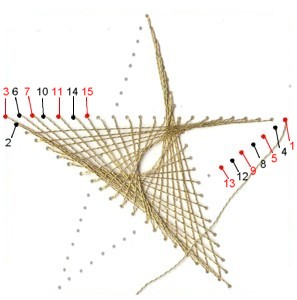
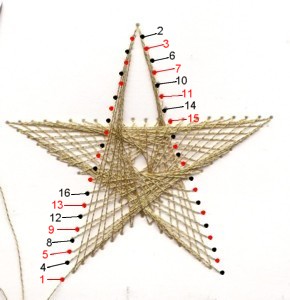
Step 11
Finish the fifth point
Step 12
When you are done, tape the end of your embroidery floss to the back of the card.
Step
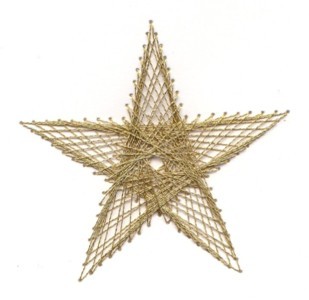
The back of the card should look similar to this when you are finished.
Step
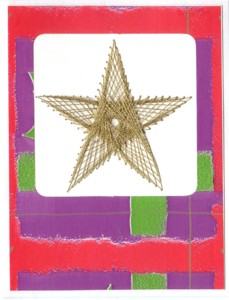
Mount your finished work on the front of the greeting card blank and find someone special to give it to!
Handcrafted Greetings Logo Designed by Tony Headrick