
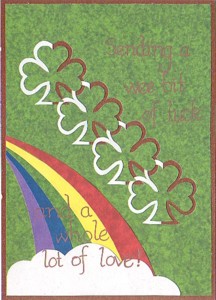
Cut and Fold St Patrick's Day Card
Follow these easy steps to make your own St. Patrick's Day greeting.
For best results read all the way through the instructions before starting.
You will need:
- St Patrick's Day Cut and Fold Pattern
- 5" x 7" white card blank
- 4 3/4" x 6 3/4" green paper - the back of the paper should be white
- 5" x 7" metallic Gold paper
- Scraps of white, purple, blue, green, yellow and red paper
- Craft knife
- Cutting mat
- Glue
- Low-tack tape or plastic-tack
Step 1
Cut the the pattern for the card front from the rest of the pattern sheet by cutting along the edges of the rectangle. Using low-tack tape or plastic-tack center and attach the pattern face-up on the 4 3/4! x 6 3/4! green rectangle.
Step 2
Place the green paper with the pattern attached to it on a cutting mat. Using your craft knife, carefully cut both lines around each half-shamrock making sure that you cut through both the pattern and the paper underneath.
Step 3

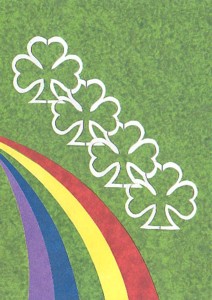
Remove the pattern. Each half shamrock should now have a narrow border around it. Fold back each of the half-shamrock borders as shown. Tuck the edge of each border under the shamrock next to it.
Step 4
Using the pattern, cut the rainbow colors from the scraps of violet, blue, green, yellow and red paper. Glue the colors to lower left section of the card. Cut out the cloud and glue it in place over the bottom of the rainbow.
Step 5
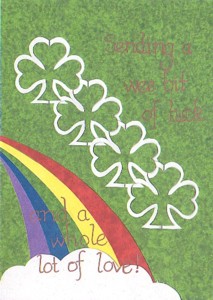
Write or stamp your greeting in the upper right and lower left corners. I used a metallic gold gel pen to write mine.
Step 6
Mount your work on metallic gold paper, then mount the paper to the front of the card blank.
Handcrafted Greetings Logo Designed by Tony Headrick